Introduction
When getting started in web application security, the first tool you will likely encounter is Burp Suite. This powerful tool allows you to intercept, modify, and send requests to the web server. However, there are a few configuration steps before getting started.
Installation
First, you will need Burp Suite installed. If you are using Kali Linux, Burp Suite has already been installed. If you don’t have Burp Suite installed, navigate to PortSwigger’s Download Page and install the latest version. After installing, open the software, and you should see the following.
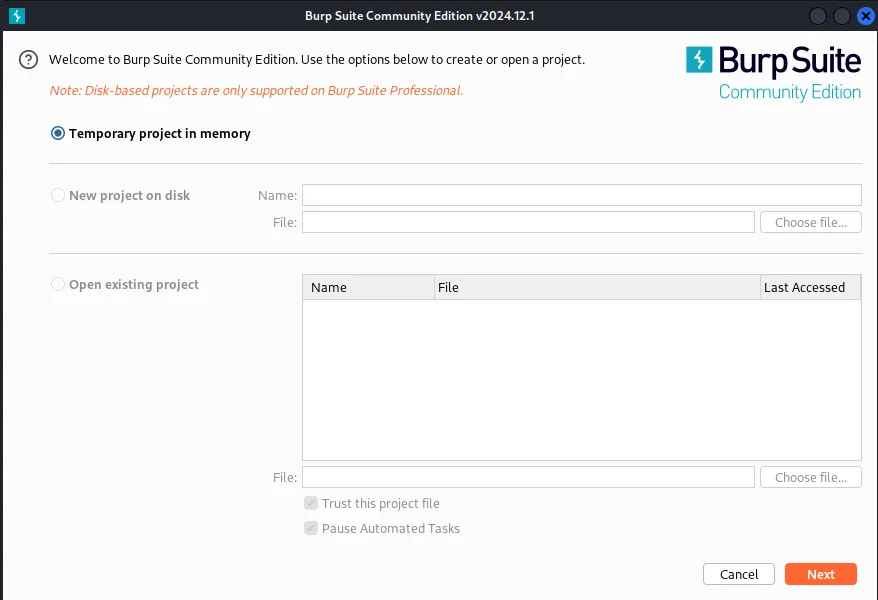
Click ‘Next’ —> ‘Start Burp,’ and a new window will appear.
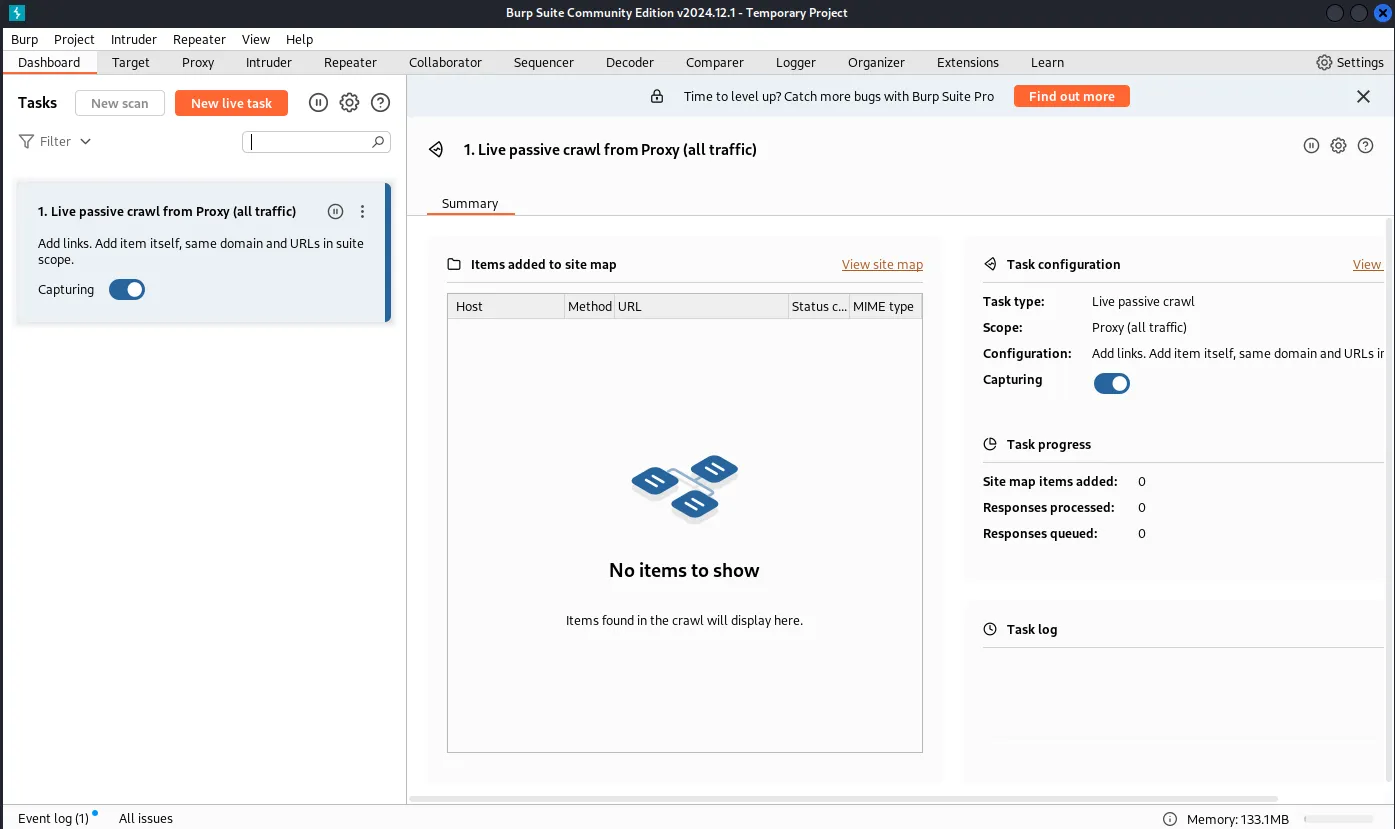
Certificate Installation
In the ‘Proxy’ tab, click on ‘Open Browser,’ and a Chromium browser will appear. The Chromium browser has already been pre-installed with the appropriate Burp certificate to begin proxying traffic. However, if you want more flexibility and use a different browser, there are additional steps.

In the Chromium browser, navigate to https://burpsuite and click ‘CA Certificate.’ This will download the Burp certificate needed to proxy traffic.

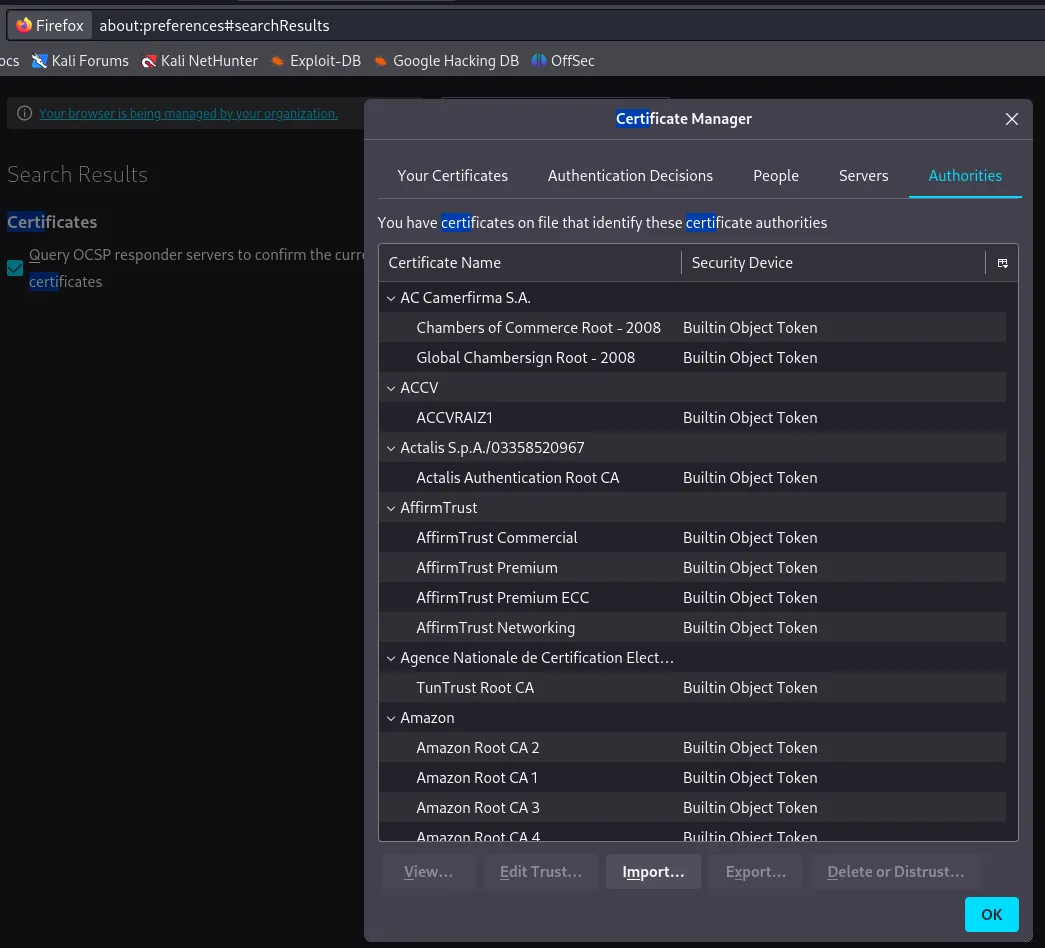
Once the ‘cacert.der’ is downloaded, open your browser. In this example, we will be using Firefox. Navigate to Firefox Settings and search for ‘Certificate.’ You will find the certificate manager. Now click ‘Import’ and select the ‘cacert.der’ we previously downloaded.
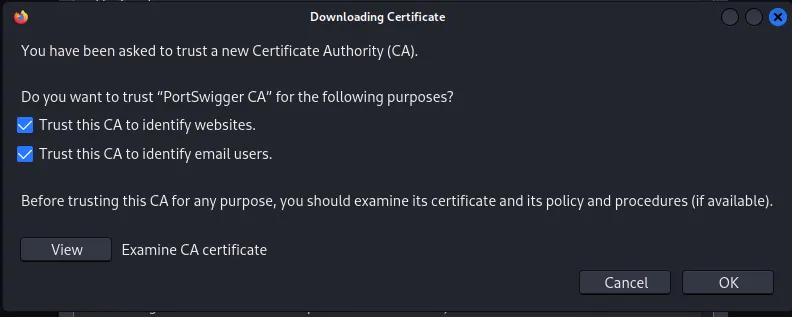
A pop-up will appear. Make sure to select both ‘Trust this CA to identify websites’ and ‘Trust this CA to identify email users’, and click ‘OK.’
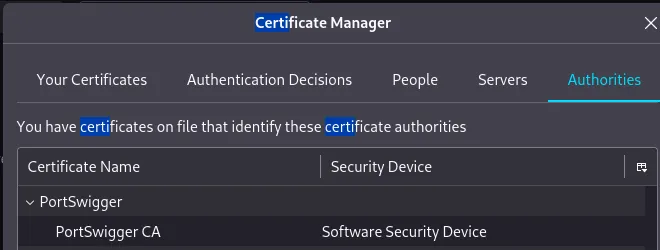
To verify it was imported correctly, check the certificates and find ‘PortSwigger.’
Setting Up The Proxy
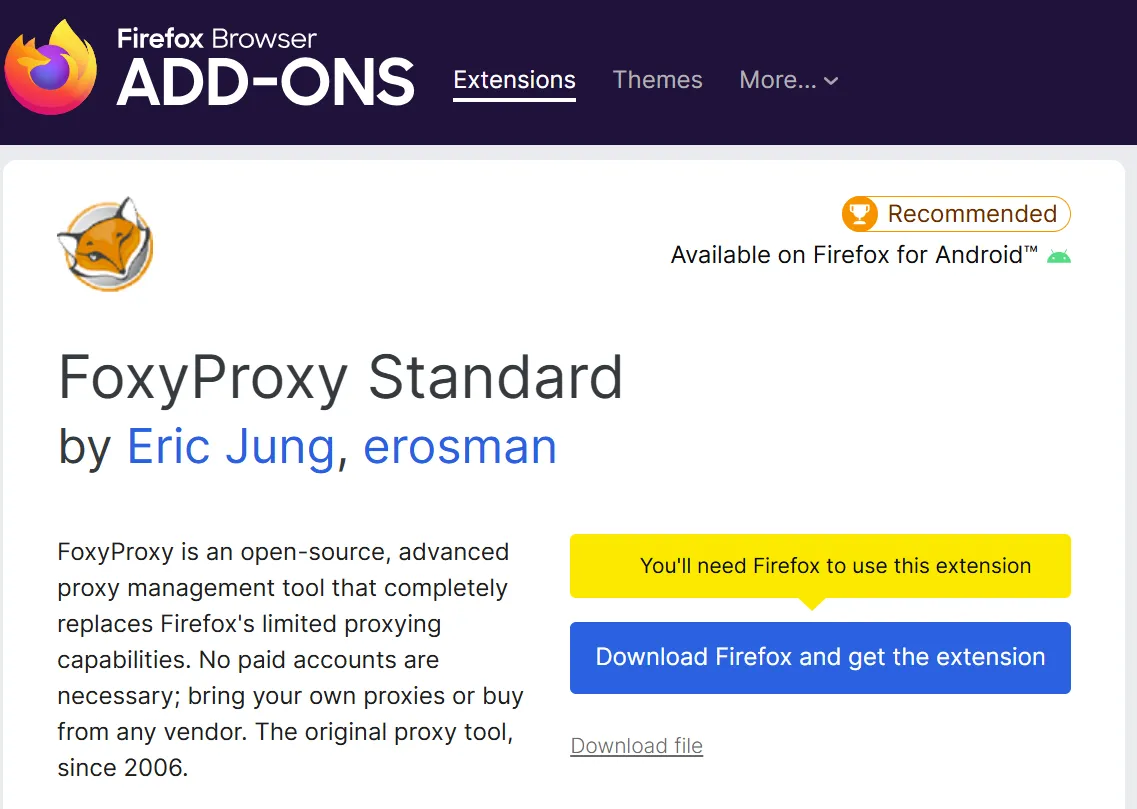
We will need an extension to configure the proxy to listen on the same port as Burp Suite. Install the FoxyProxy extension.
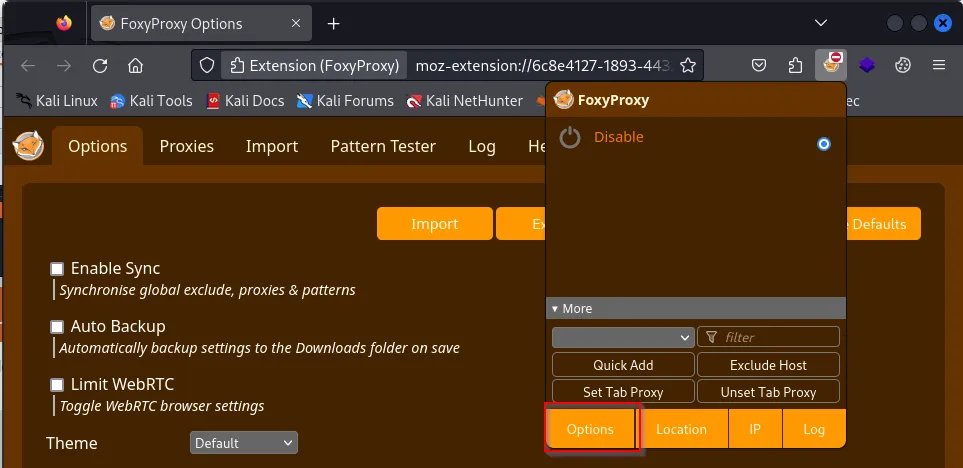
In FoxyProxy, click ‘Options’, and a new window will appear.
Click ‘Proxies’ and ‘Add’. Fill out the form with the following information.
- Title: Burp Suite
- Hostname: 127.0.0.1
- Port: 8080
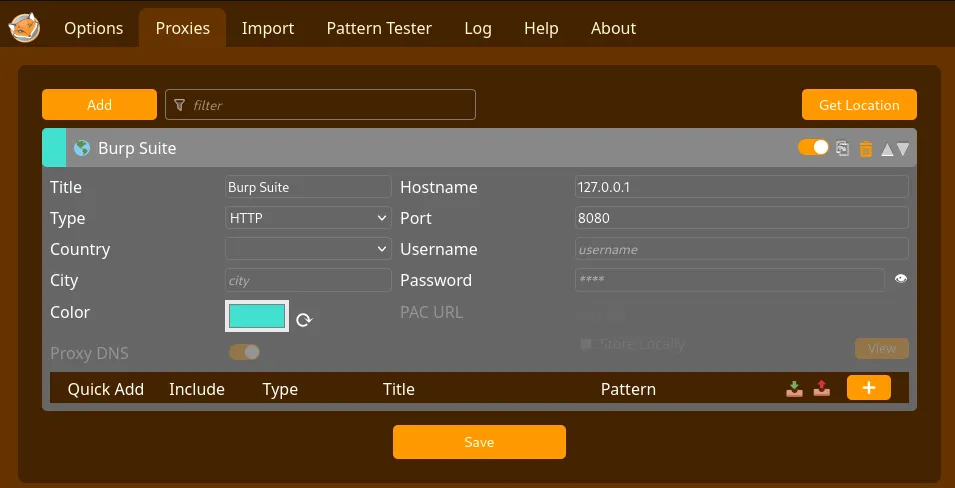
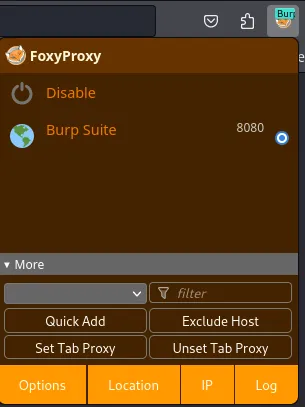
Click ‘Save’, and your configuration is complete! To activate the proxy, click the FoxyProxy extension and select ‘Burp Suite.’
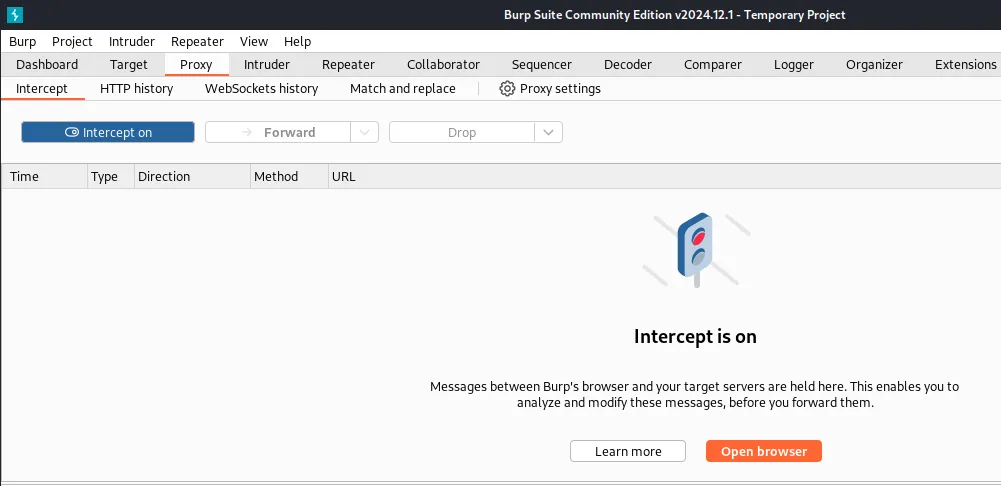
To verify that Burp Suite captures web requests, open the application and click ‘Intercept Off.’ The button will turn to ‘Intercept On’ with a blue background.
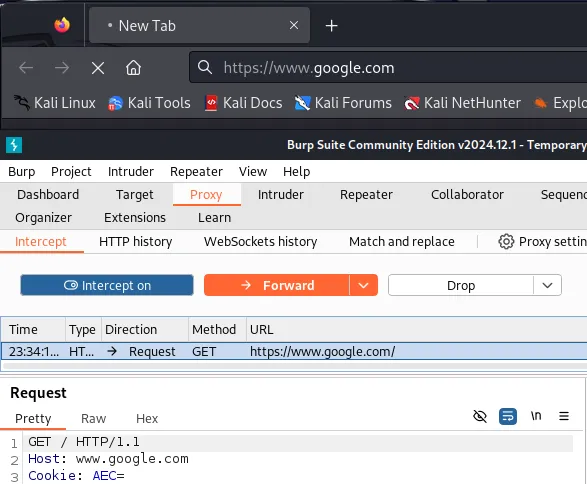
In your browser, enter https://google.com and observe the browser freezes when submitting the request. This is because Burp Suite captured the request and is waiting for you to ‘Forward’ it so it can be sent to the web server.
Conclusion
As you can see, Burp Suite is pretty easy to set up and can be used to perform web application assessments. While other tools like ZAP and Caido can perform the same, Burp Suite is still the go-to in the industry. Familiarizing yourself with it can enhance your learning in web application security and growth in the field.
Authors

Lead Technical Writer
Evan is a dedicated cybersecurity professional with a degree from Roger Williams University. He is certified in GRTP, OSCP, eWPTX, eCPPT, and eJPT. He specializes in web application and API security. In his free time, he identifies vulnerabilities in FOSS applications and mentors aspiring cybersecurity professionals.
Recent Posts

React2Shell Unauthenticated RCE (CVE-2025-55182) – Full Exploit Walkthrough | P3rf3ctR00t 2025 CTF
Comprehensive PerfectRoot 2025 CTF writeup: detailed walkthroughs of authentication bypass, React2Shell RCE, and SSTI!
Dec 9, 2025

HuntressCTF 2025 Malware Challenges – Writeups & Analysis
Learning about malware analysis through HuntressCTF challenges. Deobfuscate code and using Telegram API to retrieve the flag.
Nov 1, 2025

HuntressCTF 2025 Miscellaneous Challenges - Full Writeups
Explore the unexpected in HuntressCTF 2025 Misc challenges. Creative puzzles, crypto quirks, and logic traps that test your problem-solving edge.
Nov 1, 2025

