Introduction
Burp Suite, created by PortSwigger, is the industry-standard tool for web app security testing. It intercepts, modifies, and analyzes HTTP traffic. Although various proxy tools exist, such as ZAP and Caido, Burp Suite is still the go-to in the industry for its features and customization. This guide will cover the core functionality of Burp Suite. If you haven’t installed Burp Suite, check out the How to Install Burp Suite article.
Core Features of Burp Suite
Proxy
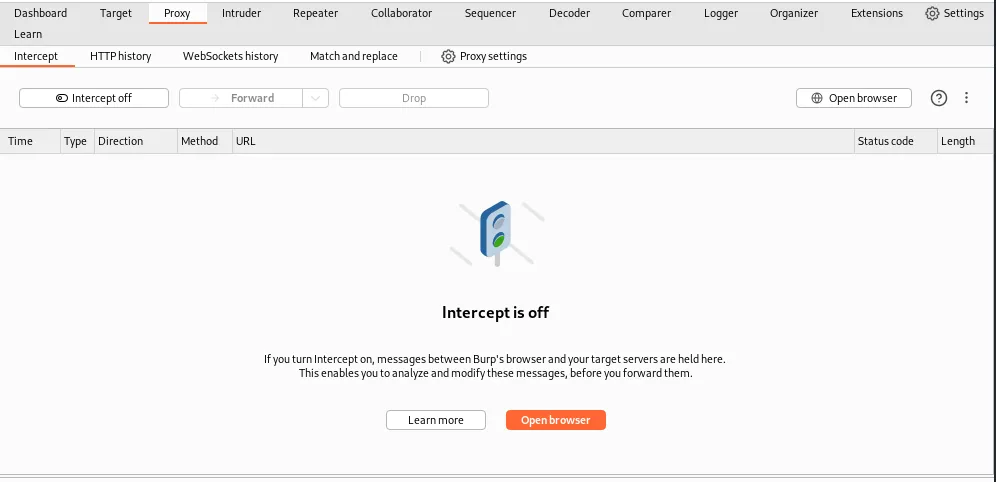
The proxy tab can intercept web traffic and view history in HTTP and WebSockets requests. This is the first pane you will work with to view all traffic through the Burp Suite proxy. To start intercepting requests, click ‘Intercept off’ to toggle it on. The intercept button will turn to ‘Intercept on’ with a blue background, and the stoplight will turn red. You can begin intercepting traffic and viewing each request. When capturing requests, the server won’t receive the request until you forward or drop the request.
Repeater
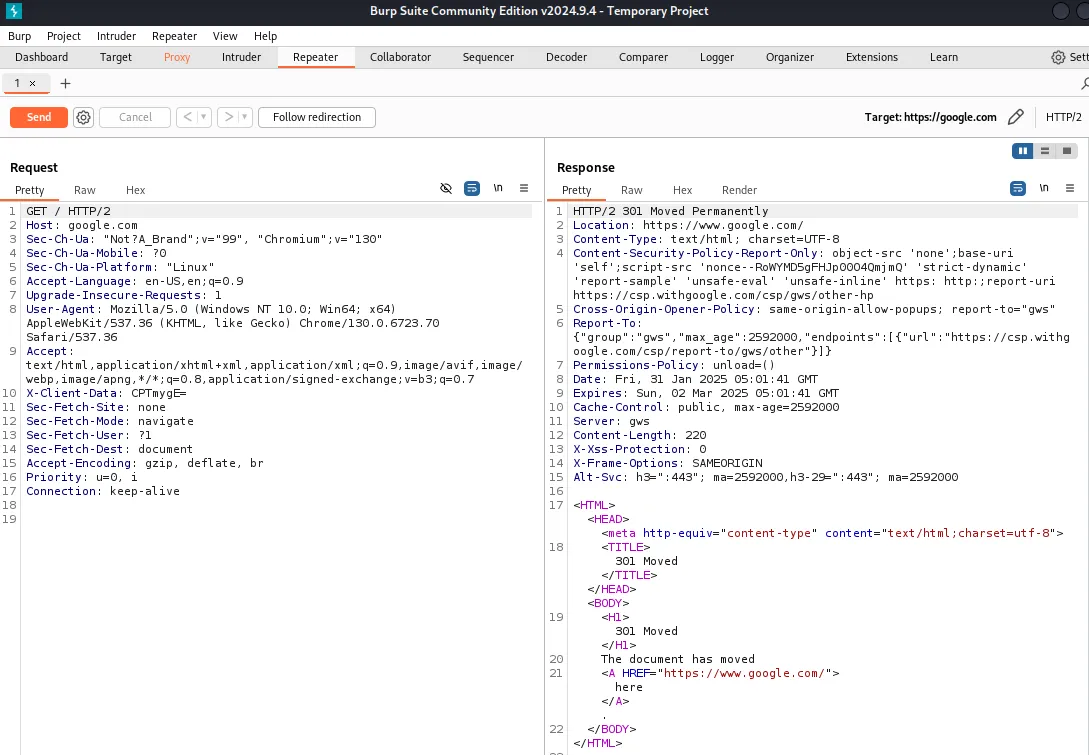
The repeater will be your best friend as you will repeat the requests and check for different responses coming from the server. You can group and rename these repeater tabs for ease of navigation, as when you’re on an engagement, you’ll likely have 50+ tabs of just repeater going at once. You will see the request on the left pane, which can be modified and resent to the server. On the right pane is the server response, which shows the different headers and HTML (or JSON) that the server sends back from the request.
Intruder
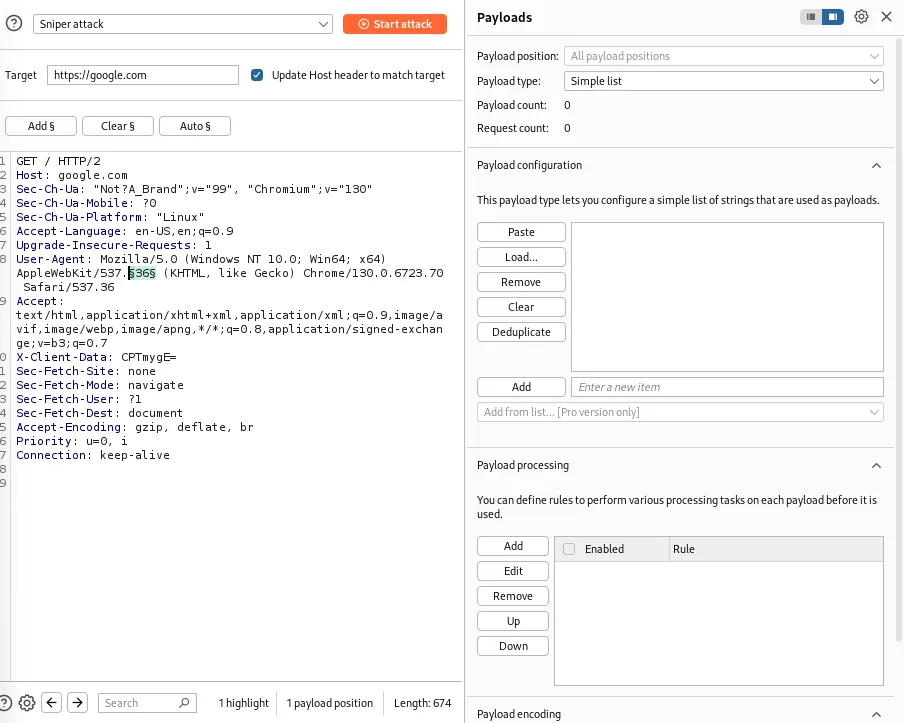
The intruder is used to perform brute-forcing or dictionary attacks on the application. This can be useful for testing rate-limiting or Insecure Direct Object Reference (IDOR) vulnerabilities. The community edition is slower than the Burp Pro, as it limits the number of threads you can use. Turbo Intruder is a Burp Suite extension that bypasses the rate limit that Burp Suite Community Edition sets on Intruder.
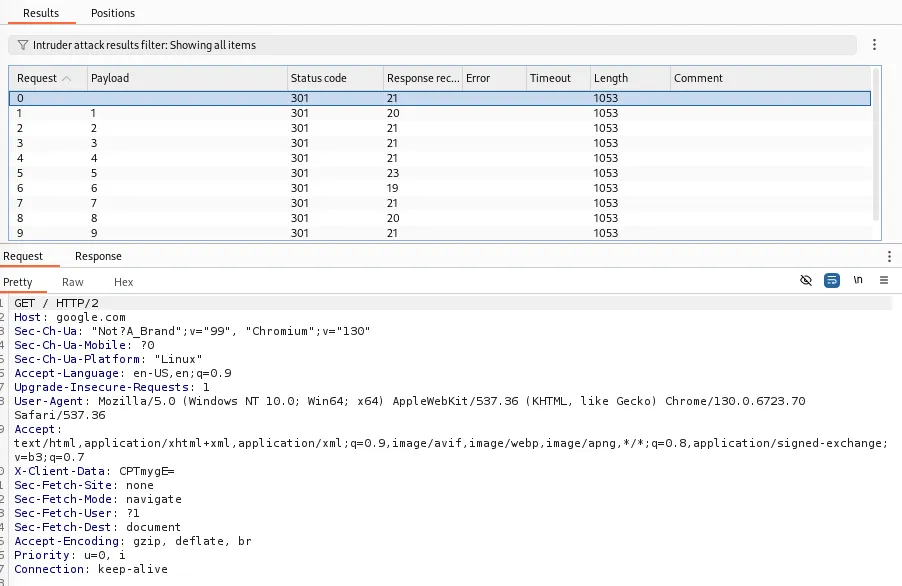
You can add § around whatever parameter or header you want to brute force. There are various payload types that you can use, but the two main ones are Simple lists and Numbers. In the ‘Payload Configuration’ section, you can specify which payloads you want to use during your attack. After starting the intruder, numerous requests will be sent to the web server. In this window, you can see the payloads, status code, response, length, request, and response sent back from the web server.
Collaborator
The collaborator helps identify Out-of-Band (OOB) attacks. This is a Burp Pro feature, so you will need to spend some money to obtain it. An alternative option is ProjectDiscovery’s interactsh, which can be easily installed on Kali or any Linux distribution. The collaborator will provide you with a link to send back requests if the web server hits the endpoint.
Extensions
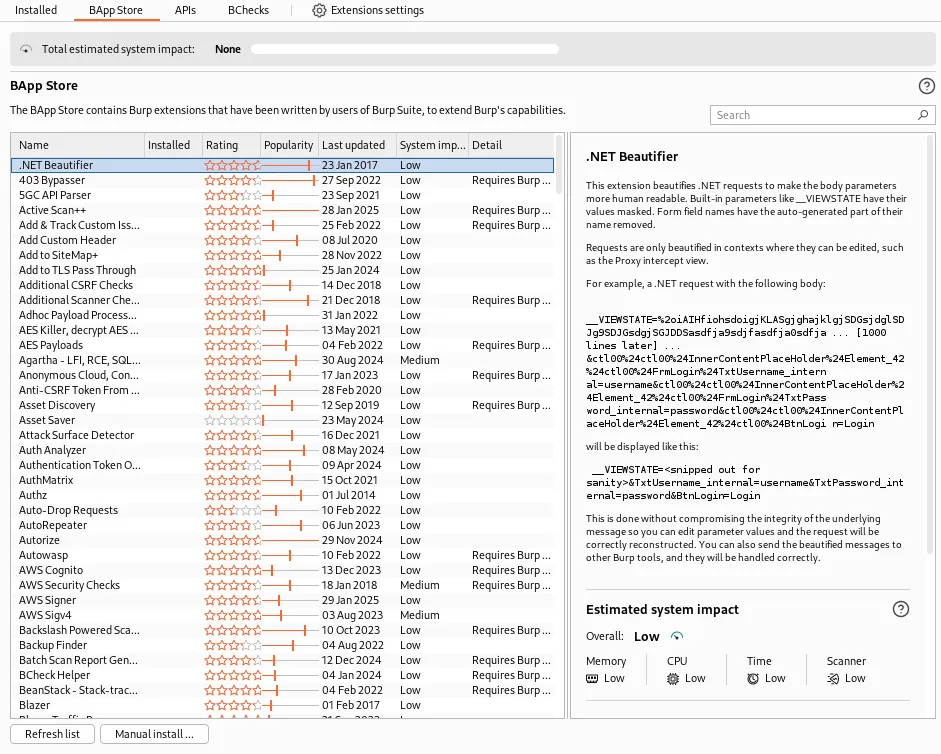
Something neat about Burp Suite is that the community comes together to create extensions that can automate some processes when identifying vulnerabilities. Some extensions require Burp Pro licensing, but most don’t. Each extension will have a rating, system impact, and popularity. Some of the ones that I use on engagements are:
- Autorize - Used to identify authorization flaws in an application (two valid user accounts required).
- JS Miner - Used to identify JavaScript endpoints on a web application (Burp Pro Required).
- InQL - GraphQL Scanner - Provides a nicely formatted GraphQL schema.
Using Burp Suite Effectively
Burp Suite can be overwhelming, as a lot is going on. After practicing, you will get the hang of it, but it will take time and patience. Here is how I use Burp Suite to find vulnerabilities.
Every tester’s methodology is different, so I recommend exploring other ways of doing this. This is just how I do it.
First, browse the website you want to attack. Just run your proxy in the background and review each application’s functionality. I recommend opening two browsers: one with a lower-privileged user and the other with a privileged user. Using Autorize, you can test for authorization issues in the application by supplying the lower-privileged user’s cookie into the extension.
After reviewing the different functionality, you can return to the ‘Proxy’ tab and view the ‘Web History’. This will show you all the other endpoints captured by Burp Suite. Look through each request until you find one that interests you.
After identifying the endpoint you want to attack, right-click on the request and select ‘Send to Repeater.’ This will send the request to the repeater so you can start modifying the different parameters and headers in the request. If you see something repetitive, such as an identification number, you can send the request to the intruder by right-clicking and selecting ‘Send to Intruder.‘
Resources To Get Started
PortSwigger Academy is a fantastic place to begin learning Burp Suite. As the tool’s creators, they have the best documentation. Additionally, they have free labs that you can try out and use Burp Suite on.
TryHackMe is another website that teaches users how to break into cybersecurity. They have an entire web application security path available, including Burp Suite tutorials and what each component does within the software.
Damn Vulnerable Web Application (DVWA) is a localized copy of an intentionally vulnerable application that you can use to practice. This will help identify vulnerabilities using Burp Suite.
Lastly, Juice Shop is similar to DVWA but is provided by OWASP. It is a modernized application with realistic scenarios that you would see in the wild.
Conclusion
Burp is a complex tool, but it is widely used within the industry. With practice and dedication, you can learn Burp Suite inside and out. This tool has many features, such as the repeater, web history, intruder, collaborator, and more. Platforms such as TryHackMe, PortSwigger Academy, or the DVWA can help you solidify your understanding of Burp Suite and obtain a methodology.
Authors

Lead Technical Writer
Evan is a dedicated cybersecurity professional with a degree from Roger Williams University. He is certified in GRTP, OSCP, eWPTX, eCPPT, and eJPT. He specializes in web application and API security. In his free time, he identifies vulnerabilities in FOSS applications and mentors aspiring cybersecurity professionals.
Recent Posts

React2Shell Unauthenticated RCE (CVE-2025-55182) – Full Exploit Walkthrough | P3rf3ctR00t 2025 CTF
Comprehensive PerfectRoot 2025 CTF writeup: detailed walkthroughs of authentication bypass, React2Shell RCE, and SSTI!
Dec 9, 2025

HuntressCTF 2025 Malware Challenges – Writeups & Analysis
Learning about malware analysis through HuntressCTF challenges. Deobfuscate code and using Telegram API to retrieve the flag.
Nov 1, 2025

HuntressCTF 2025 Miscellaneous Challenges - Full Writeups
Explore the unexpected in HuntressCTF 2025 Misc challenges. Creative puzzles, crypto quirks, and logic traps that test your problem-solving edge.
Nov 1, 2025

